 By Lauren Holland
Updated November 2026
To shampoo car seats and vacuum them properly, you need to remove loose debris first, treat stains with the right cleaner for the material, extract the residue, and let the seats dry fully before you close the car up. Done in that order, a set of cloth seats can look noticeably cleaner, and the odor from spilled drinks and sweat usually fades along with the stains. The steps below cover fabric, vinyl and leather, along with the checks that keep you from soaking the foam underneath.
Why Vacuuming Comes Before Shampooing
Shampoo works best on a surface that is free of loose grit. If you spray cleaner onto a seat full of sand and crumbs, the wet dirt turns into a paste that grinds into the fibers when you scrub. A thorough dry vacuum first lifts the particles that would otherwise smear. It also reduces the amount of cleaner you need.
Shopping for one? See our guide: Car Vacuum Shampoo Cleaner: 6 Best Picks Compared for Car Interiors (2026).
Plan on vacuuming twice: once before any cleaning, and once after the seats are fully dry to lift any loosened residue and fuzz.
Tools and Supplies You Will Need
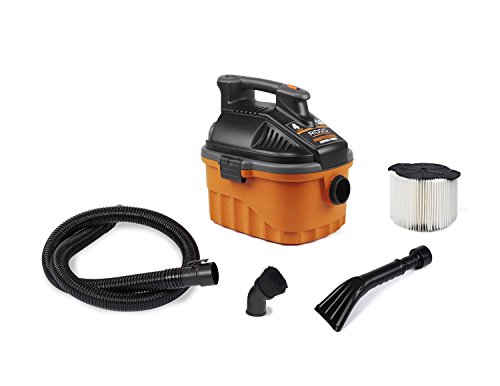
- A vacuum with a crevice tool and a soft brush attachment
- An upholstery cleaner or a mild car-interior shampoo labeled for your seat material
- A soft-bristle brush, such as a nylon or horsehair detailing brush
- A spray bottle for diluted cleaner, or a foam sprayer
- Two or three clean microfiber towels
- A wet-dry extractor, or a damp towel for light cleaning
- A fan or dry towels to speed drying
- A pH-neutral leather cleaner and conditioner if your seats are leather
Step-by-Step: How to Shampoo Car Seats
Step 1: Remove Loose Debris
Take out the floor mats and any seat-back pockets or removable covers if they can be detached. Work from the top of the seat down, using the brush attachment on the surfaces and the crevice tool along the seams, the gap between the seat back and cushion, and the rails underneath. Crumbs and sand collect in those spots, so take your time there.
Step 2: Identify the Seat Material
The material decides which cleaner and how much moisture you can use.
| Seat material | Cleaner to use | Moisture level | Key caution |
|---|---|---|---|
| Cloth or woven fabric | Upholstery shampoo or fabric cleaner | Moderate, with extraction | Foam under the fabric can hold water for days if over-wet |
| Vinyl | Mild interior cleaner or diluted all-purpose cleaner | Low to moderate | Avoid harsh solvents that can dry or crack the surface |
| Leather | pH-neutral leather cleaner, then conditioner | Very low (damp cloth) | Never saturate; test in a hidden spot first |
If you are unsure of the material, check the owner’s manual or the seat tag. Many manufacturers list approved cleaning products there.
Step 3: Test the Cleaner
Spray a small amount on an area that is not visible, such as the underside of the seat or a side panel near the floor. Wait a few minutes and blot with a white towel. If the color transfers or the surface looks changed, switch to a gentler product.
Step 4: Pre-Treat Stains
Apply cleaner to stains and let it dwell for about five minutes. Work from the outside edge of a stain toward the center so the stain does not spread. Use a soft brush in small circles. Do not scrub hard enough to fray fabric.
Step 5: Shampoo the Surface
Lightly mist the seat with diluted cleaner or work foam into the fabric with a brush. Aim for a damp surface, not a soaked one. Overspraying is the most common cause of mildew and lingering odor. If you have a wet-dry extractor, follow its instructions and pass over each section once or twice, pulling the dirty solution back up.
Step 6: Extract and Blot
Blot the wet area with a clean towel, pressing firmly to pull moisture out. Use a dry section of towel each time you blot. Repeat until the towel comes away mostly clean. Car Seat Water Vacuum: 5 Best Picks for Clean Upholstery goes further into this.
Step 7: Dry Completely
Leave the doors or windows open in a dry, shaded spot. Run a fan pointed at the seats if you can. Drying cloth seats can take several hours, and thick foam may need overnight. Check the cushion base with your hand before closing the car. A cool or damp feel means it is not ready.
Step 8: Vacuum Again and Condition Leather
Once dry, vacuum the seats again to lift any fibers or residue. For leather, apply a small amount of conditioner with a soft cloth and buff off the excess.
Common Mistakes to Avoid
- Over-wetting the foam. Water that reaches the padding is hard to remove and often causes a sour smell later.
- Using household cleaners with bleach or strong solvents. These can discolor fabric and dry out leather or vinyl.
- Skipping the test spot. A quick check prevents permanent color changes.
- Closing the car too soon. Trapped moisture is a frequent source of musty odor.
- Scrubbing hard on stains. Aggressive brushing can pill or fray fabric.
- Using too much product. A thin, even layer cleans better than a thick one.
Tips for Better Results
- Clean the seats in mild weather so they dry faster.
- Keep a separate microfiber towel for each section to avoid spreading dirt.
- Use a stain-specific pre-treatment for oil or ink before the general shampoo.
- Plan a deep clean at least once a year, and spot-clean spills promptly.
- For a fuller overview of related steps, see How to Clean Car Seats: Fabric, Leather and Vinyl.
Recommended Gear
A dedicated upholstery cleaner and a soft detailing brush are the two items that make the biggest difference for most seats. A wet-dry extractor helps with heavy soiling, since it removes more of the dirty solution than towels alone.
- An upholstery and carpet extractor, which pulls dirty water out of cloth seats and reduces drying time. View on Amazon
- A pH-neutral leather cleaner and conditioner set, suited to leather seats that need gentle care. View on Amazon
- A soft nylon detailing brush, useful for working cleaner into seams and textured fabric. View on Amazon
FAQ
Can I use a regular household carpet cleaner on car seats?
Sometimes, but check the label. Many carpet cleaners are formulated for thicker fibers and may leave residue or be too strong for car upholstery. A product made for automotive fabric is the safer choice.
How long does it take for car seats to dry after shampooing?
Drying time depends on humidity, airflow and how wet the seats got. Light cleaning may dry in a few hours, while deep cleaning with extraction can take overnight or longer. Check the foam beneath the surface before using the seat.
Should I vacuum before or after shampooing?
Both. Vacuum first to remove loose debris so it does not turn to mud, then vacuum again after the seats are fully dry to pick up anything that loosened during cleaning.
Can I shampoo leather car seats?
Leather is better served by a pH-neutral leather cleaner and a damp cloth rather than foaming shampoo. Follow with a conditioner to keep the surface supple. Avoid soaking the leather.
How often should I shampoo my car seats?
Many owners do a full deep clean once or twice a year and spot-clean spills as they happen. Households with children, pets or frequent passengers may need more frequent attention.
What if the seat still smells after cleaning?
Persistent odor often means moisture or residue remains in the foam. Make sure the seat dried completely, then consider an odor-neutralizing product made for vehicle interiors. If the smell is strong or unusual, a professional detailer can inspect the padding.
Is it safe to use a wet-dry extractor on seats with airbags?
Be cautious around side airbag seams and seat sensors. Avoid saturating these areas, and check your owner’s manual for any manufacturer guidance on cleaning near airbag components. If you are unsure, consult a professional detailer.
Conclusion
Shampooing car seats and vacuuming them in the right order gives clean, fresh results without soaking the padding underneath. Match the cleaner to the material, work lightly, and let everything dry fully before you close up the car. A little patience with drying is what keeps the seats from smelling musty later.
Related reading
- Shampoo and Vacuum Car Wash: A Step-by-Step Guide for Beginners
- Vacuum Tester for Car: How to Check Vacuum Leaks Step by Step
- Vacuum Meter for Car: What It Reads and How to Use One
- Repair Vacuum Hose Car: 4 Best Kits for DIY Fixes (2026)
Ready to choose one?
About Lauren Holland
Lauren Holland is part of our editorial team and reviews and edits our car care & garage supplies guides, checking product details against manufacturer specifications and owner feedback.