 By Lauren Holland
A wax and grease remover for car paint strips old wax, sealant, oil residue, and fingerprint film off the surface so that new protection bonds properly. Used correctly, it leaves the paint squeaky clean and ready for a sealant, ceramic coating, or a fresh coat of wax. This guide walks through when to use it, how to pick the right product, and a step-by-step method that protects your clear coat.
Why Use a Wax and Grease Remover Before Protection?
Most people assume that washing a car removes everything on the paint. It does not. Car wash soap cleans dirt and road film, but it leaves behind a thin layer of old wax, polish oils, and silicone from tire dressings or detailing sprays. That layer prevents new products from curing evenly and can cause hazing, streaks, or poor durability.
Shopping for one? See our guide: Nano Wax for Car vs Carnauba Wax: Which Is Better for Your Paint?.
A dedicated prep solvent dissolves that film. Detailers often call this step “IPA wipe” or “prep wipe,” and it is the reason a sealant or coating looks glossy and lasts as long as the manufacturer claims.
When you should use it
- Before applying a paint sealant, ceramic coating, or a new wax layer
- After a polish or compound session, to remove polishing oils and dust
- When beading has faded and you want to check whether old protection is still bonded
- When you bought a used car and do not know what was applied previously
When you should not use it
Do not use a strong solvent as your regular wash product. Repeated use can dry out trim, fade plastic, and remove protection you actually want to keep. Stick to prep duty, and only when a fresh layer is about to go on.
Choosing the Right Wax and Grease Remover
Products fall into a few broad categories. The right one depends on what you are removing and what you plan to apply next.
| Product type | Best for | Notes |
|---|---|---|
| Diluted isopropyl alcohol (IPA) solution | General prep before wax or sealant | Inexpensive and widely available; typically mixed around 15 to 25 percent IPA with distilled water for paint use |
| Ready-made prep spray (wax and oil remover) | Quick prep between panels or on small areas | Formulated to evaporate cleanly and leave minimal residue |
| Ceramic coating prep solution | Heavy prep before a coating | Designed to remove polishing oils fully; follow the coating maker’s instructions |
| Strong degreaser | Engine bay, wheels, and undercarriage only | Not recommended for painted panels unless the label says it is paint-safe |
Always check the label for paint safety. Some degreasers contain solvents that can soften certain clear coats, and that risk increases in hot sun or on single-stage paint.
Tools and Supplies You Need
- A wax and grease remover or a diluted IPA mix in a clean spray bottle
- Two or three clean, dry microfiber towels with a soft pile (a plush edgeless towel works well)
- A second spray bottle with plain water and a few drops of car wash soap, if you want a pre-rinse
- A bucket and a wash mitt for a final rinse if you plan to wash the panel first
- Good lighting, ideally a handheld LED or a bright work light held at an angle
- Nitrile gloves to keep skin oils off the surface
Step-by-Step: Using Wax and Grease Remover on Car Paint
Step 1: Wash and dry the car
Start with a clean car. Use a proper wash method such as the two-bucket method so you are not dragging grit across the paint. Dry the car completely with a soft towel or a blower. Remover cannot dissolve dirt, and trapped grit becomes a scratch risk once you start wiping.
Step 2: Work in small sections
Divide the car into panels: hood, roof, one door, one fender, and so on. Work on one panel at a time, and keep the area shaded. Products dry quickly in direct sun and can leave residue or streaks.
Step 3: Apply the remover to the towel, not the paint
Mist a light amount onto a clean microfiber towel. Spraying directly onto a hot or large panel wastes product and can run into trim and seams. A slightly damp towel gives you control.
Step 4: Wipe in one direction
Use light pressure and wipe in straight lines, overlapping each pass by about one-third of the towel’s width. Keep going until the towel comes away clean. Flip to a fresh section of the towel frequently.
Step 5: Flip the towel and buff dry
Immediately follow with a dry, clean microfiber to lift any remaining solvent. This second towel is what removes the last of the film. Work quickly so solvent does not sit on the paint.
Step 6: Inspect under good light
Hold a light at a low angle across the panel. If you still see smearing or a shine that looks uneven, repeat the wipe on that spot. Clean paint should look uniform and slightly squeaky.
Step 7: Apply your protection right away
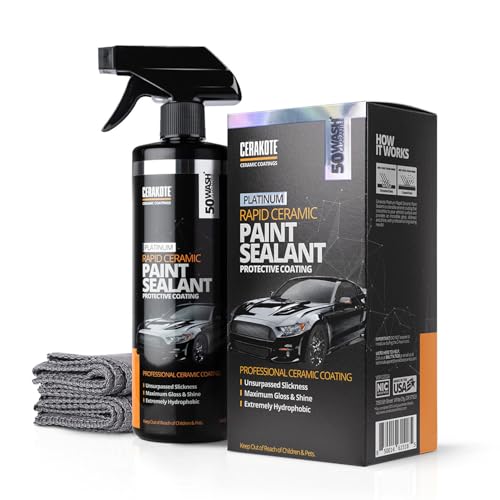
Once a panel is prepped, the surface is open. Touching it with bare hands or letting dust settle can contaminate it. Apply your sealant or coating within a short window, following the product’s directions for flash time and curing.
Tips for Safe, Effective Results
- Test on a small, hidden area first, such as a lower rocker panel, before doing the whole car.
- Keep the remover away from rubber seals, plastic trim, and badges where you can.
- Use separate towels for remover and for buffing, and label them so you do not mix them up with wash towels.
- Wash towels after prep work, and do not use fabric softener, which can ruin microfiber’s wiping ability.
- Work in a ventilated space and wear gloves. Solvent fumes should not be inhaled in an enclosed garage.
Common Mistakes to Avoid
- Skipping the wash. Remover on dirty paint pushes grit into the clear coat and causes swirl marks.
- Using too much product. Heavy saturation can seep into panel gaps and leave residue on trim.
- Working in direct sun. Fast evaporation leaves streaks that are hard to remove.
- Using a household degreaser. Dish soap, all-purpose cleaners, and strong degreasers can strip protection and dull paint.
- Waiting too long to protect. Once prepped, panels can pick up dust and fingerprints. Apply protection soon after.
- Ignoring glass and plastic. Some solvents leave a film on glass or cloud unprotected plastic. Keep it off those surfaces.
Recommended gear
A basic set of clean microfiber towels is the most useful supply for prep work, since dirty towels leave more residue than the solvent itself. Look for a soft, plush towel designed for buffing rather than a scrubbing towel.
For applying remover in a controlled way, a fine-mist spray bottle lets you dampen a towel evenly without soaking the surface. Choose one rated for solvents, since some plastic bottles degrade with alcohol-based mixes.
A bright, handheld LED light makes it easy to see streaks and leftover film. Angling light across the paint is the simplest way to check whether a panel is truly clean.
Nitrile gloves keep skin oils off the freshly prepped surface and protect your hands from solvent. Buy a box rather than a single pair, since you will go through them quickly on a full car.
If you are deciding how much protection to layer on after prep, Car Wax vs Paint Sealant vs Ceramic Coating explains how each one bonds and how long it lasts. For removing bonded contamination that prep solvent cannot touch, How to Clay Bar a Car: When and How to Decontaminate Paint covers the next step in the process. If you are working on water marks alongside prep, How to Remove Water Spots from Car Paint and Glass is a useful companion read.
FAQ
Can I use rubbing alcohol as a wax and grease remover on car paint?
Yes, diluted isopropyl alcohol is one of the most common DIY prep solutions. Use a mix around 15 to 25 percent IPA with distilled water, and test on a hidden spot first. Full-strength alcohol can evaporate too fast and may stress some clear coats.
Will wax and grease remover strip my car’s clear coat?
A properly used prep solvent does not damage healthy factory clear coat. Problems usually come from very strong degreasers, long dwell times, or working in heat. Using a paint-safe product and wiping off promptly keeps risk low.
How often should I use a prep solvent on my car?
Only before applying new protection or after polishing. Routine washing does not need it. Overuse can remove wax and sealant faster than necessary.
Do I need to use remover before every wax application?
It is strongly recommended if the old layer is unknown or heavily worn. If you are reapplying the same product on a surface that is clean and beading well, a quick prep wipe is still worth doing for the best bond.
Can I use wax and grease remover on glass and headlights?
Most prep solvents can be used on glass, but keep them away from plastic headlight lenses and rubber trim unless the label says it is safe. Clean glass with a dedicated glass cleaner for a streak-free finish.
What happens if I skip the remover before applying a ceramic coating?
Leftover oils and old wax can cause uneven curing, high spots, and poor bonding. Coatings generally require a clean, bare surface, so prep is especially important with them. Follow the coating maker’s prep steps.
Is wax and grease remover safe to use in a closed garage?
Ventilation matters. Open a door or run a fan, wear gloves, and avoid breathing fumes directly. If you have respiratory concerns or are unsure about solvent exposure, consult a professional or the product’s safety data sheet before use.
Conclusion
A wax and grease remover for car paint is a simple but important prep step that clears the way for better bonding and longer-lasting protection. Wash first, work in small sections, wipe lightly, and finish with a clean dry towel. Test on a hidden area, avoid harsh degreasers, and apply your protection promptly. Done this way, the results are clean, even, and worth the extra few minutes.
Related reading
Ready to choose one?
About Lauren Holland
Lauren Holland is part of our editorial team and reviews and edits our car care & garage supplies guides, checking product details against manufacturer specifications and owner feedback.