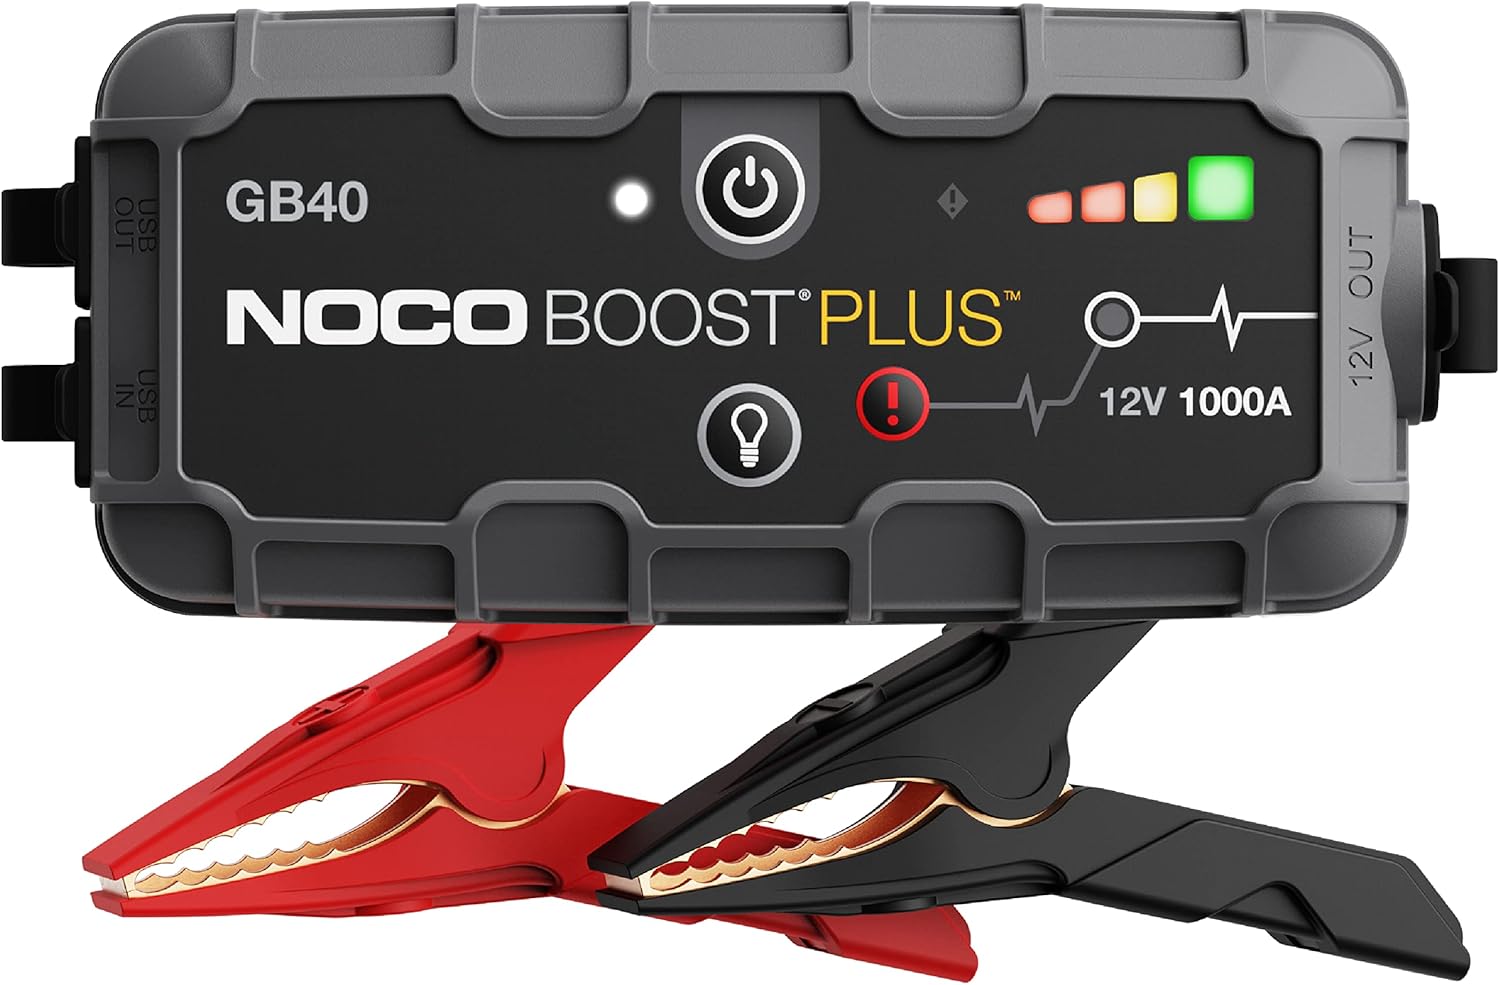
Using a portable jump starter can get you back on the road quickly without waiting for another vehicle, but incorrect use can damage your car’s electronics or cause injury. Safe operation starts with reading both the jump starter manual and your vehicle owner’s manual before any connection. This guide covers the essential safety checks, clamp order, crank limits, and what to do when the battery itself is the real problem.
What You Need
Before attempting a jump, gather the following items and information:
- Fully charged portable jump starter – verify its charge level before you drive. Most units have a battery indicator button. If the indicator shows low, recharge the pack first.
- Safety glasses – protect your eyes from battery acid or sparks.
- Vehicle owner’s manual – locate the recommended ground point for the black clamp (some modern vehicles specify the negative terminal, others a dedicated ground point).
- Jump starter manual – understand any special functions like a boost mode or reverse‑polarity alarm.
- Gloves (optional but recommended) – heavy‑duty rubber or leather gloves add a layer of protection.
- Emergency flashlight – keep a reliable emergency flashlight for the car to see under the hood in low light.
Step-by-Step Safety Instructions
1. Pre-Check the Jump Starter and Battery
Confirm the jump starter has enough charge. If the pack is below the recommended level (usually indicated by red or blinking lights), recharge it before use. A partially charged pack may fail to start the engine and could be damaged by repeated attempts.
Inspect the car battery for cracks, leaks, swelling, or frost. Never attempt to jump‑start a frozen or visibly damaged battery. A frozen battery can explode when current flows. If the battery appears damaged, replace it before attempting a jump.
Park the vehicle on a level surface, turn off the ignition, and remove the key. Switch off all accessories: headlights, radio, air conditioner, dome lights, and anything else that draws power. Close all doors and the trunk to prevent interior lights from draining the battery.
2. Position the Jump Starter Safely
Place the portable jump starter on a stable, dry, non‑conductive surface (such as the ground or a plastic bin). Never set it on the battery or near moving engine parts like the fan belt or pulleys. Keep the unit away from any spilled battery acid.
3. Connect the Red Clamp First – to Positive (+)
Identify the positive terminal on the car battery. It is usually marked with a red cover, a plus (+) sign, or a red plastic tab. Attach the red clamp of the jump starter to the positive terminal. Make sure the clamp makes a firm connection – it should not wiggle or slip off. If the terminal is corroded, clean it with a wire brush before attaching the clamp. Corrosion can prevent proper conductivity and cause arcing.
4. Connect the Black Clamp – to a Ground Point (or Negative, per Manual)
This step varies by vehicle. Many modern cars specify that the black clamp should go to an unpainted metal engine block or chassis ground, not directly to the negative battery terminal. This reduces the risk of sparks near the battery. Consult your owner’s manual. If the manual says to connect to the negative terminal, do so carefully. Otherwise, find a solid metal bolt or bracket away from the battery, moving parts, and fuel lines.
Never let the two clamps touch each other while either is connected to the battery or during connection. Touching the clamps together can create a short circuit, damage the jump starter, and cause sparks.
5. Reverse‑Polarity Indicators
Most modern portable jump starters have built‑in reverse‑polarity protection. If you accidentally connect the red clamp to negative or the black to positive, the unit will beep, flash a warning light, or refuse to output power. If this happens, disconnect immediately and reconnect correctly. Do not override the alarm unless the manual explicitly instructs you to use a “boost” or “override” mode for special situations (such as a dead battery that confuses the sensor). Only use that mode if the manufacturer’s guide directs it.
6. Turn On the Jump Starter (If Required)
Some units have a power button or a dedicated “start” or “boost” switch. Others activate automatically when clamps sense the battery. Read the device’s manual. If a button is needed, press it only after clamps are securely connected. If the unit has a “boost” mode, use it only when the manual says it is safe – typically for deeply discharged batteries that lack enough voltage for the unit to detect polarity. In boost mode, the unit bypasses some safety checks, so double‑check your connections before engaging it.
7. Start the Engine
Enter the vehicle, ensure the transmission is in Park (or Neutral for manual), and turn the ignition key. Limit each crank attempt to no more than the time specified in the jump starter manual – usually only a few seconds. If the engine does not start, wait as long as the manual says before trying again. Attempting to crank repeatedly without a pause can overheat the jump starter and damage the battery.
If the engine turns over very slowly or just clicks, the issue may not be a simple dead battery. The starter, alternator, or a corroded connection could be at fault. Do not keep cranking. Move to the troubleshooting section below.
8. Disconnect the Clamps in Reverse Order
Once the engine is running, turn off the jump starter if it has a power button. Remove the black clamp from the ground (or negative terminal) first. Then remove the red clamp from the positive terminal. Never let the clamps touch each other or any metal surface during removal. Stow the jump starter away from the engine compartment.
9. Recharge the Jump Starter
After use, recharge the portable jump starter as soon as possible. Most units take several hours to fully recharge. Keeping it topped off ensures it is ready for the next emergency. A portable jump starter left discharged for a long time may lose battery capacity.
Common Mistakes
- Clipping the black clamp to the negative terminal when the manual says otherwise. This can create a spark near the battery and risk igniting hydrogen gas. Always follow the vehicle manufacturer’s recommendation.
- Letting the clamps touch each other. Even briefly, this can short‑circuit the jump starter. Keep the clamps separated until connected to the battery.
- Using the jump starter on a frozen or damaged battery. A damaged or frozen battery can rupture or explode. Inspect the battery closely before connecting anything.
- Skipping the pre‑charge check. Starting with a half‑charged pack may fail to provide enough power, and multiple attempts can drain it completely.
- Cranking for too long or too frequently. This overheats the starter motor and the jump starter. Adhere to the crank and rest intervals in the manual.
- Jump‑starting in a closed garage. Even though a portable jump starter produces no fumes, the vehicle’s exhaust will. Always work outdoors or in a well‑ventilated area.
- Not wearing eye protection. Battery acid or a spark can cause serious eye injury. Safety glasses should be worn every time you open the hood to work on the battery.
Troubleshooting
Engine cranks slowly or not at all
If the accessories are dim and the engine turns over weakly, the battery may be too depleted for the jump starter alone. Check that all vehicle accessories are off. Try connecting the jump starter and waiting 1–2 minutes (if the manual allows) before cranking, so the pack can transfer some charge to the battery. If the cranking speed does not improve, the battery may need to be replaced.
Engine clicks but does not turn over
A rapid clicking sound usually points to a dead battery or poor connection. Verify that both clamps are firmly attached to clean metal. If the clamps are on and the clicking persists, the battery may have a shorted cell or the starter motor could be faulty. Do not keep trying – continued attempts can damage the starter. Call a roadside service or tow the vehicle to a shop.
Jump starter alarm sounds or won’t output power
This is almost always a reverse‑polarity protection warning. Disconnect both clamps, inspect the battery terminals again (positive vs. negative), and reconnect correctly. If the alarm continues, the battery voltage may be too low for the unit to detect polarity. Some jump starters have a manual override (boost mode) for this situation. Only use it after confirming your connections are correct by double‑checking the battery markings.
Engine starts but dies immediately
This can point to a battery too weak to support the engine, a charging system problem or another fault. Disconnect the jump starter as the manual directs and avoid repeated restarts. If the battery warning light stays on while the engine runs, have the charging system checked.
Battery terminal is heavily corroded
Corrosion prevents a good electrical connection. If you have a wire brush and baking soda solution, clean the terminals before attempting the jump. If you cannot clean them, the connection may be too poor for the jump starter to work. In that case, replace the battery or hire a professional.
FAQ
Can I use a portable jump starter on a completely dead battery?
Yes, most portable jump starters can start a vehicle with a battery that is too dead to power the lights or starter. However, some units require a minimum battery voltage to activate (check the manual). If the battery is completely dead (0 volts), the jump starter may not detect it and you may need to use the override/boost mode if available. Check the jump starter manual for minimum voltage requirements.
How long can I leave the jump starter connected after starting the engine?
Once the engine is running, you should disconnect the jump starter within a couple of minutes. Prolonged connection can overheat the unit or overcharge the battery. Follow the manufacturer’s directions. Typically, you remove the clamps as soon as the engine runs smoothly.
Is it safe to jump‑start a hybrid or electric car with a portable jump starter?
Most hybrid and electric vehicles have a separate 12‑volt auxiliary battery that can be jumped just like a conventional car. However, the location and connection points can be unusual. Always consult the vehicle owner’s manual. Never connect a jump starter to the high‑voltage battery pack – only to the designated 12‑volt jump‑start terminals.
What should I do if the jump starter sparks when I connect it?
A small spark is normal when completing the circuit, especially when connecting the black clamp. But a large, continuous spark indicates a short circuit or wrong connection. Immediately disconnect the clamps. Check that the red clamp is only on positive and the black on negative (or the designated ground). Ensure the clamps are not touching each other or any metal surface. Inspect the battery for damage. If the sparking persists, do not use the jump starter – have the battery and your jump starter inspected by a professional.
Closing Thoughts
Safe use of a roadside emergency equipment item like a portable jump starter comes down to preparation and following the correct sequence. Always keep your jump starter charged, wear safety glasses, and consult both the vehicle and device manuals before making connections. If the battery is old, frozen, or damaged, replace it first. By adopting these safety habits, you avoid costly repairs and stay safe during a roadside breakdown. For other essential supplies, consider a car first aid kit to complement your emergency gear.